You'll need to enlarge the photo to read the details. Hope you can make it. We would love for you to join us for some Holiday fun.
Creativity at your fingertips


PROJECT #4 - Photo Tree
 I would suggest that you lay your album in your box, so that you can easily see where you should start. I put Doc on the first flap and then when you lift the accordion album out of the box the other six dwarfs are all on the opposite side of Doc. In other words, Doc is on one side and if you turn the album over, you'll see all the other dwarfs. The pictures below show the order I have them in, but you could mix them around without having too much of a problem. "Happy" needs to be last if you use the same wording that I have on each page. Have fun making this album, its one of those projects that's all fun. Other things I did...... I inked the edges of the paper before adhering and I set 3 eyelets in each page (as you can see the first page has 6, 3 on each side, because "Doc" is on one side and "Sleepy" is on the back side.
November Recipe Page:


Marinated Mushrooms, yummy! This recipe has lots of flavor with all the herbs to season those tasty little morsels. When you get your kit, you'll see that all of the words and herbs are on one sheet of paper and you'll be cutting them out to use on this page. I used green ink to embellish the edge of the background paper and recipe card. This is one of those pages where you can let the creativity flow....enjoy.
October
How many times have you heard, "What's for Dinner?" Well, I know my mom would tell you, "too many to count!" I had lots of fun with this page. I used my new 12-inch revolution platform to cut the tri-colored braid that runs down the left side of the page. You'll need to do the braiding when you get your kit. The letters for "dinner" are included in your kit, but will need to be punched out using a circle punch (I used varying sizes, as the letters are different sizes) and then I sanded the edges to expose the white core. I inked the small tag with a matching green and wrote the words, "what's for". Recipe cards are all on one sheet of paper that you will need to cut apart. I have included the recipes, but you'll need to do your own copying of the recipes onto the cards, then pick your favorite to adhere to the front of the pocket and tuck the remaining cards into the top of the pocket. This is really fun paper, I hope you like it as much as I did when I found it!

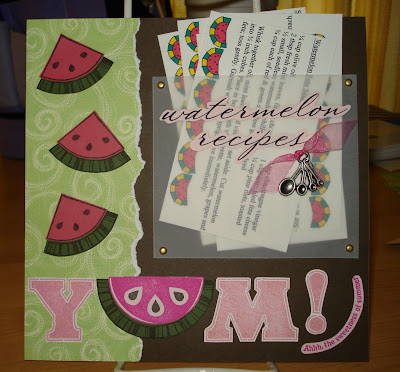
August Page

Hints for this page: Cut around all the stamped images. The pink fleshy part of the watermelon is adhered to the green rind, in other words, don't cut out the rind, leave the inside so you can glue the pink to the green. The recipe cards are cut 3X5 and the vellum envelope is attached using four brads. You'll need to tie the ribbon through the metal charm in your kit (they are not all the same, but it will either have to do with cooking or summer picnics) and then glue dot it onto the page.